How to Propagate Lilies: 4 Methods That Work
Table of Contents
- Why Propagate Lilies Instead of Buying New Bulbs
- Method 1: Lily Bulb Scaling for Maximum Yield
- Method 2: Dividing Lily Bulbs by Clump Separation
- Method 3: Harvesting and Planting Bulblets and Bulbils
- Method 4: Growing Lilies from Seed
- Post-Propagation Timeline: When Will You See Blooms?
- Common Propagation Mistakes and How to Avoid Them
- Conclusion: Choosing the Right Method for Your Garden
- Frequently Asked Questions
Last Updated: September 8, 2026
Most gardeners assume propagating lilies means waiting years for a single bulb to multiply. In truth, one healthy bulb can become dozens of new plants in a season. This guide from Firefly Farm and Mercantile walks through four proven methods so you can match the technique to your patience level and garden goals.
Lily propagation creates new plants from an existing bulb through scaling, division, bulblets, or seed. The method depends on how many plants you want, how quickly you need blooms, and whether you're growing species lilies or named hybrids.
Why Propagate Lilies Instead of Buying New Bulbs
Propagation is the most cost-effective way to expand a lily collection, especially with prized heirloom varieties that are hard to source. Dividing your own stock preserves the exact genetics you know performs well in your soil.
There's also a conservation angle. Many heritage lily cultivars have become scarce as commercial growers focus on a handful of showy hybrids. By propagating and sharing these plants, home gardeners play a real role in keeping genetic diversity alive. The North American Lily Society maintains registries of historic cultivars, many of which now survive mainly through backyard propagation efforts.
Method 1: Lily Bulb Scaling for Maximum Yield
Bulb scaling is the most productive method, yielding up to 50 new plants from a single mature bulb (extension.umn.edu). It involves removing individual scales from the bulb's outer layers, each capable of forming a new bulblet. This works best on firm, healthy bulbs in late summer or early autumn, just after foliage dies back.
Close-up of hands peeling individual scales from a healthy lily bulb on a wooden table, with a small bowl of peat moss and vermiculite nearby, soft natural window light
Step-by-Step Bulb Scaling Process
- Choose a mature bulb that has bloomed at least once and shows no signs of rot or damage.
- Gently remove 5 to 10 outer scales by pressing downward at the basal plate, where scales attach to the bulb's base.
- Dust the exposed wounds with a fungicide powder to prevent rot during the rooting period.
- Place the scales in a plastic bag with slightly moist vermiculite or peat moss, then seal and store at room temperature for six to eight weeks.
- Check weekly for small bulblets forming at the scale bases.
- Once bulblets appear, pot each scale individually with the base just below the surface of a well-draining growing medium.
- Keep pots in a cool, bright location through winter, then transplant outdoors in spring.
Method 2: Dividing Lily Bulbs by Clump Separation
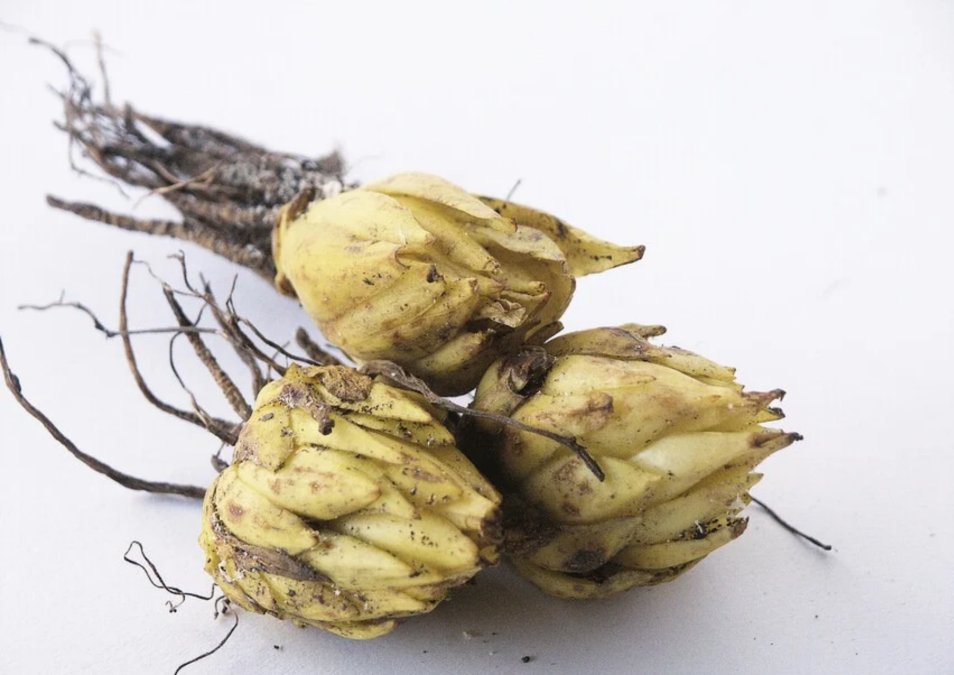
Dividing lily bulbs through clump separation is the simplest method, working well for established plantings that have multiplied over three or more years. Dig up the clump in early autumn, gently pull apart the bulbs by hand, and replant each bulb with its own roots and basal plate immediately.
The limitation is that you're limited to what the clump has produced, typically three to five new plants per year.
Replant divisions at the same depth they were growing, usually about three times the bulb's height. Space them 8 to 12 inches apart to give the roots room to establish before winter dormancy.
Method 3: Harvesting and Planting Bulblets and Bulbils
Some lily species produce small offset bulbs called bulblets at the stem base underground, while others form aerial bulbils in leaf axils along the stem. Both are miniature bulbs that grow into full-size plants within two years.
Harvest bulblets when you dig up the parent bulb for division, carefully separating them from the main root mass. Bulbils can be collected in late summer when they loosen and fall easily from the stem. Plant both types immediately in a nursery bed or propagation tray at a depth of about 1 inch.
Method 4: Growing Lilies from Seed
Growing lilies from seed is the slowest but most rewarding method, and the only one producing entirely new cultivars. Species lilies come true from seed; hybrids produce variable offspring that may not resemble the parent.
Some species germinate immediately, while others require a period of warm-cold stratification to break dormancy. A common approach is to sow seeds in trays in late winter, keep them at room temperature for several weeks, then move them to a refrigerator or cold frame for two to three months before bringing them back to warmth.
Seed-grown lilies typically take three to five years to flower. This method is best reserved for species lilies and for gardeners interested in breeding their own hybrids.
Post-Propagation Timeline: When Will You See Blooms?
Knowing how to propagate is only half the equation. The other half is knowing where to grow your new propagules and when to expect that first flower. If you're an urban gardener with only a balcony or patio, you can still propagate lilies successfully using containers.
Year-by-Year Expectations by Method
Propagation Method | Year 1 | Year 2 | Year 3 | Year 4+ |
|---|---|---|---|---|
Clump separation | Blooms in first summer | Full bloom | Mature clump | Divide again |
Bulblets and bulbils | Foliage only (12-18" tall) | First bloom (often small) | Full-size blooms | Divide if crowded |
Bulb scaling | Small bulblets in tray | Foliage, pencil-thick stems | First bloom (some cultivars) | Full production |
Seed (epigeal) | Single leaf blade | Bulb forms underground | Foliage thickens | First bloom (year 3-5) |
Container-Based Propagation Setup (For Urban Gardeners)
Stage 1: The Nursery Tray (First 6-8 Weeks)
For scales and bulblets, start in a 4-inch deep nursery tray with drainage holes, using a mix of 50% perlite and 50% peat moss. Place the tray somewhere that stays between 65-70°F, out of direct sunlight.
Stage 2: The Grow-Out Pot (After First Sprout)
Once your propagules sprout, transplant them into individual 6-inch pots using standard potting mix amended with perlite. At this stage they need bright, indirect light, a south-facing window or grow light set to 14 hours per day.
Stage 3: The Overwintering Pot (Year 1 Winter)
Lily bulbs need a cold period to reset their growth cycle. Outdoors in containers this happens naturally; indoors you must simulate winter. After foliage dies back in fall, move pots to an unheated garage, basement, or refrigerator (away from fruit, which emits ethylene gas). Keep soil barely moist for 8-10 weeks.
Indoor vs. Outdoor: Key Differences
Factor | Indoor Setup | Outdoor Garden Bed |
|---|---|---|
Light | Grow light or bright window (14 hrs/day) | Full sun to part shade |
Temperature | Controlled (65-75°F) | Variable, seasonal |
Watering | Check every 2-3 days | Natural rainfall + supplemental |
Cold period | Simulated in fridge or cold room | Natural winter chill |
Pest risk | Lower, but watch for fungus gnats | Higher (slugs, aphids, lily beetles) |
Space | Limited to tray/pot size | Unlimited expansion |
What to Expect at Each Milestone
Month 2 (Scales): Small white bulblets, about the size of a pea, will form at the base of each scale. This is your first sign of success.
Month 4 (Bulblets): The bulblets will have developed tiny root systems. They're ready to be potted individually.
Month 8 (First Spring): You'll see the first foliage emerge. For scaling, this is a single thin leaf. For bulblets, expect a stem about the thickness of a pencil.
Month 14 (Second Spring): Bulblets and bulbils will produce their first bloom, though it may be smaller than a mature flower. This is a good time to move them to their final location.
Month 20-26 (Scaling): Your scaled bulbs will reach flowering size. Some fast-growing cultivars like Asiatic hybrids may bloom in year two, while Oriental hybrids often wait until year three.
The timeline is not a guarantee, it's a roadmap. Cooler summers, poor soil, or pest pressure can delay blooms by a season. The best approach is to propagate more than you need, so you have margin for natural losses.
Common Propagation Mistakes and How to Avoid Them
The difference between a tray of healthy bulblets and a bowl of mush often comes down to what you spot before it's too late.
Visual Guide: Healthy vs. Failing Propagules
Healthy Scale: Firm to the touch, cream or pale yellow in color, with a dry basal plate. A small bulblet will emerge from the base within 4-6 weeks.
Rotting Scale: Translucent, brownish, or mushy. It often smells sour or musty. If you see gray or green mold, the scale is beyond saving. Remove it immediately so the spores don't spread to neighboring scales in the bag.
Healthy Bulblet: Plump, firm, and attached to a small root system. The outer skin should be intact, similar to a miniature onion.
Desiccated Bulblet: Shriveled, wrinkled, and lightweight. This happens when bulblets are left exposed to dry air for more than a few hours. Once they shrivel, they rarely recover.
The Rot Spiral: Why One Bad Scale Ruins the Batch
A single rotting scale in a sealed plastic bag can collapse an entire run. Rot creates ethylene gas and introduces fungal spores that thrive in the humid, closed rooting environment.
The Fix: Check your bag or tray every 3-4 days, not weekly. Open the bag, smell it, and look for condensation. If you see any moisture pooling at the bottom of the bag, that's a warning sign. Remove the affected scale and dust the surrounding area with a sulfur-based fungicide.
The "Too Deep" Problem
A less obvious mistake is planting scales, bulblets, or divisions too deep. When a propagule is buried more than an inch below the surface, the emerging shoot expends all its stored energy just to reach light, often producing a weak, pale sprout.
The Visual Cue: The top of a scale or bulblet should be visible at the soil line, or covered by no more than a quarter-inch of fine grit or vermiculite. If you can't see where you planted it, you've planted it too deep.
The Dormancy Disruption Mistake
Many home propagators fail because they start at the wrong time. Lilies have a hard dormancy requirement; scaling bulbs while they're actively pushing new growth means the scales lack stored energy to produce bulblets. Wait until the stem turns yellow or brown and pulls away easily.
If you're propagating indoors in containers, you must still respect the dormancy cycle. After bulblets form, they need a cold period of 6-8 weeks below 40°F to trigger root growth. Without this chill, they will sit dormant and may rot before they ever sprout.
Troubleshooting Quick-Reference Table
Symptom | Likely Cause | Visual Check | Immediate Action |
|---|---|---|---|
Scales turn brown and mushy | Overwatering or poor airflow | Translucent, wet-looking tissue | Remove, increase ventilation, dust with fungicide |
Bulblets shrivel up | Dry air exposure | Wrinkled, lightweight skin | Rehydrate in damp peat for 24 hours, then plant |
No bulblets after 8 weeks | Scale detached without basal plate | Flat, clean break at the base | Discard; only scales with basal plate tissue will root |
Sprouts are pale and leggy | Planted too deep | Long, white shoot before green leaf | Unearth slightly, ensure light reaches the shoot tip |
Mold on soil surface | Stagnant air, high humidity | Fuzzy white or gray growth | Scrape off top layer, reduce watering, increase airflow |
Conclusion: Choosing the Right Method for Your Garden
Start with clump separation if you want blooms next year, or try bulb scaling if you're willing to wait for a larger payoff.
At Firefly Farm and Mercantile, we understand the joy of multiplying a favorite bloom into a whole border of color. Our curated collection of seasonal garden bulbs offers healthy, ethically sourced stock to begin your propagation journey, and our heirloom seed catalog includes species lilies worth growing from seed. Shop our selection and start building the garden you've imagined.
Propagating lilies rewards patience with abundance, turning a single bulb into a legacy of blooms. Firefly Farm and Mercantile supports your efforts with quality bulbs, heirloom seeds, and the personal guidance of owner Andre.
Frequently Asked Questions
Do lilies multiply on their own?
Yes, lilies multiply on their own, but slowly. Each bulb naturally produces small offset bulbs called bulblets at its base, and some varieties form bulbils along the stem. A single bulb may only produce 1-3 new bulblets per year. If you want to propagate lilies faster, bulb scaling is the most efficient method, as one bulb can yield dozens of new plants.
What is the best time of year to divide lily bulbs?
Early fall is the best time to divide lily bulbs, about 4-6 weeks after the plant has finished flowering. The foliage should still be green but starting to yellow. This timing gives divided bulbs time to establish roots before winter. Dividing in spring is possible but risks damaging emerging shoots and may delay blooming for a season.
How long does it take for a lily scale to bloom?
A lily scale typically takes 2-3 years to reach blooming size. During the first year, scales develop small bulblets at their base. These bulblets are then planted and grow into larger bulbs in year two. By the third growing season, most bulbs are large enough to produce flowers. This timeline is similar for growing lilies from seed.
Can you grow a lily from a cutting?
Stem cuttings rarely work for lilies. Unlike many plants, lily stems do not readily form roots when cut and placed in soil or water. Instead, successful propagation relies on bulb scaling, dividing lily bulbs, or harvesting bulblets. For stem-propagating varieties, look for bulbils that form in leaf axils along the stem, which can be planted directly.


