How to Plant Bulbs for Succession Blooms
Table of Contents
- What Is Bulb Layering and Why It Creates Succession Blooms
- The Bulb Layering Technique: A Step-by-Step Planting Method
- Spring Flowering Bulbs Planting Depth and Spacing Guidelines
- Best Spring Bulb Combinations for Staggered Blooming
- When to Plant Fall Bulbs for Your Hardiness Zone
- Troubleshooting Common Bulb Layering Failures
- Caring for Succession Blooms After Planting
- Frequently Asked Questions
Last Updated: September 10, 2026
What Is Bulb Layering and Why It Creates Succession Blooms
Succession blooms are waves of flowers that open one after another across a season, rather than all at once. The most reliable way to get them from spring-flowering bulbs is a planting method called bulb layering, or lasagna planting: stacking different bulb types at different depths in the same hole so their bloom times stagger naturally. This single technique can turn a three-week tulip show into eight weeks of color.
Here's why it works. Bulbs planted deeper emerge and bloom later than shallow-planted ones, and early, mid, and late-season varieties have their own internal clocks. Stack the right mix and the garden hands you a continuous sequence without any replanting.
The contrast with conventional advice matters: most guides tell you to plant one variety per bed and accept a short window. Layering flips that. You get more bloom from the same square footage, and the fading foliage of early bulbs hides behind the emerging stems of later ones.
The Bulb Layering Technique: A Step-by-Step Planting Method
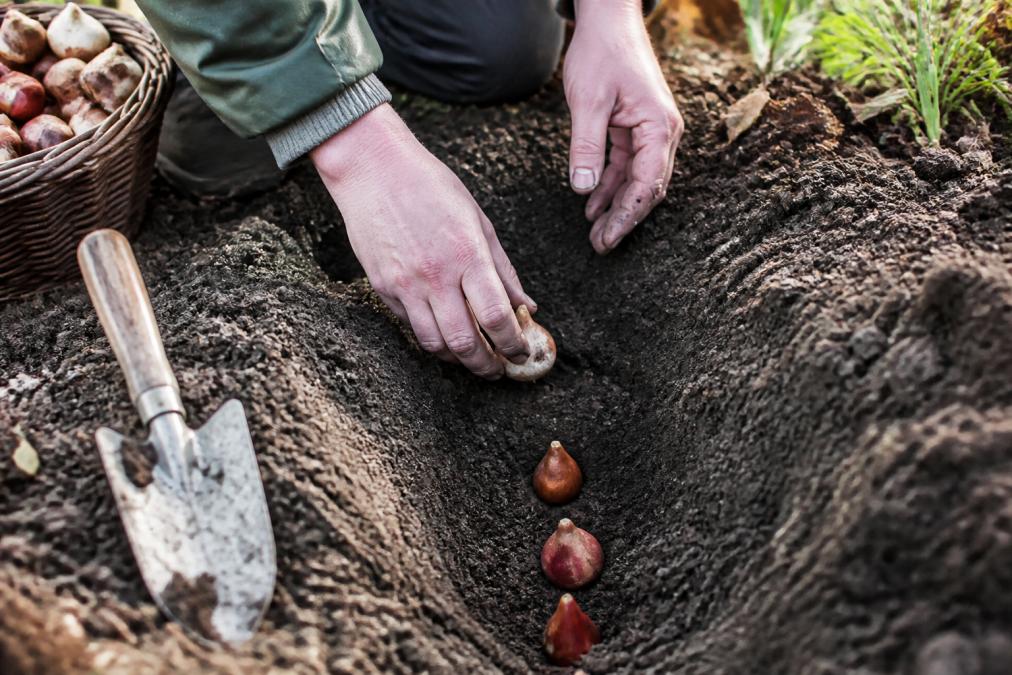
The layering technique is straightforward: dig one deep hole, then plant in bands from largest and deepest to smallest and shallowest. Each layer sits on its own cushion of soil, and roots from the top layer grow down between the lower bulbs.
Step 1: Prepare the Soil and Planting Site
Work the soil to a depth of about 10 to 12 inches, mixing in compost or aged manure so the bed drains freely. Bulb rot is the number one killer in heavy clay, so if water pools after rain, amend generously or plant in a raised bed. Aim for a loose, crumbly texture.
Step 2: Layer Large, Mid, and Small Bulbs by Depth
Set the largest bulbs, like daffodils and big tulips, at the bottom. Add 2 inches of soil, then mid-size bulbs, then another 2 inches, then small bulbs near the surface. Keep every bulb's pointy end up and its root plate down.
Step 3: Water, Mulch, and Mark Your Layers
Water thoroughly after planting, then mulch with 2 to 3 inches of shredded leaves or straw. Label each layer so you know what to expect where. This also keeps you from accidentally digging into the bed later.
Spring Flowering Bulbs Planting Depth and Spacing Guidelines
The general rule for spring flowering bulbs planting depth is three times the bulb's height, measured from base to tip (rhs.org.uk). Spacing runs roughly two to three bulb-widths apart. Follow those two numbers and most layering mistakes disappear.
| Bulb Type | Planting Depth | Spacing | Bloom Window |
|---|---|---|---|
| Large daffodils | 6-8 inches | 4-6 inches | Early to mid |
| Standard tulips | 6 inches | 4-5 inches | Mid to late |
| Small bulbs (muscari) | 3-4 inches | 2-3 inches | Early |
| Crocus | 3 inches | 2-3 inches | Very early |
Depth protects bulbs from frost heave and keeps them out of reach of digging animals. Shallower planting is the most common reason bulbs bloom poorly the second year.
Best Spring Bulb Combinations for Staggered Blooming
The best spring bulb combinations pair an early bloomer, a midseason star, and a late finisher in one hole, with bloom windows that overlap just enough to hide fading foliage. The trick most guides skip is matching the windows so the handoff is seamless rather than gappy.
Here is a bloom-time compatibility matrix showing how the layers stack. Read each column as one planting hole.
| Layer | Hole A (Earliest) | Hole B (Mid) | Hole C (Late) |
|---|---|---|---|
| Top (shallow) | Crocus | Muscari | Muscari |
| Middle | Tete-a-Tete Daffodil | Blushing Lady Bunch Flowering Daffodil | Blushing Lady Bunch Flowering Daffodil |
| Bottom (deep) | Standard tulips | Foxtrot Tulip | Palmyra Tulip |
| Bloom window | Very early to early | Early to mid | Mid to late |
Our reliable trio for a single hole: Tete-a-Tete Daffodil for the earliest color, Blushing Lady Bunch Flowering Daffodil for the midseason wave, and Foxtrot Tulip or Palmyra Tulip to close the show. Tete-a-Tete is a miniature heirloom daffodil that deer and rabbits leave alone, so it works at the front of a mixed border. Blushing Lady carries multiple apricot blossoms per stem and pairs beautifully with blue muscari. Foxtrot's double pink blooms look like peonies; Palmyra's deep burgundy echoes Queen of Night.

To build your own matrix, sort your candidate bulbs into three buckets by bloom window, then assign one from each bucket to a layer. The early bucket goes on top because shallow bulbs warm first and bloom first. The late bucket goes deepest. If two varieties share a window, put the shorter one on top so it does not get shaded out.
A common pattern is to plant the same midseason daffodil in every hole and vary only the top and bottom layers. That gives you a consistent backbone of color with different bookends, which reads as continuous bloom even when individual varieties fade. spring garden maintenance.
If you would rather not sort varieties yourself, niche collections can group bulbs by bloom window so you can pull one early, one mid, and one late without cross-referencing bloom charts.
When to Plant Fall Bulbs for Your Hardiness Zone
The right time to plant fall bulbs is when soil temperatures drop to around 55°F at planting depth, which usually means four to six weeks before the ground freezes hard. That single rule flexes into a very different calendar depending on where you garden, and getting the window right matters more for layering than for single-variety planting because a stacked hole needs every layer to root before deep cold arrives.
Here is a zone-by-zone planting window to work from. Treat these as target ranges, not fixed dates, and shift earlier if a hard freeze is forecast sooner.
| Hardiness Zone | Typical Planting Window | Soil Temp Target | Notes |
|---|---|---|---|
| Zone 3 | Mid-September to mid-October | 50-55°F | Finish before the first hard freeze; mulch heavily after |
| Zone 4 | Late September to late October | 50-55°F | Cold stratification is essentially free here |
| Zone 5 | Early October to mid-November | 50-55°F | The widest comfortable window |
| Zone 6 | Mid-October to late November | 50-55°F | Watch for warm spells that delay soil cooling |
| Zone 7 | Late October to early December | 55°F | Plant late enough that bulbs don't break dormancy early |
| Zone 8 | November to early January | 55°F or below | Pre-chill bulbs in the refrigerator if soil stays warm |
| Zone 9 | December to early January | 55°F or below | Refrigerator pre-chilling is usually required |
A few mechanisms explain why the calendar slides so much. Bulbs need a period of cold, called cold stratification, to trigger the biochemical switch that starts flower development (extension.psu.edu). In zones 3 through 6, winter delivers that cold for free, which is why colder-climate gardeners often get more reliable bloom from the same bulbs. In zones 8 and 9, winter may not stay cold long enough, so many gardeners pre-chill bulbs in a refrigerator for six to ten weeks before planting (extension.illinois.edu). Keep bulbs away from fruit in the fridge; ripening fruit releases ethylene gas that can damage the flower bud inside the bulb.
Soil temperature is the number to trust over the calendar. A simple soil thermometer pushed four to six inches down tells you more than any date. If the reading is still above 60°F, wait. If it has dropped below 50°F and the ground is not yet frozen, you can still plant, though root growth will be slower.
For succession blooms specifically, the planting window interacts with layering order. Plant the whole stacked hole in one session so all layers experience the same soil conditions. If you plant the deep layer weeks before the shallow layer, the top bulbs may not root before a freeze and will heave out of the ground. One planting day, one hole, all layers.
If you garden across more than one zone or want varieties already matched to your climate, cold-hardy daffodil and tulip collections can be selected to layer into a season-long show, and smaller niche collections can group varieties by bloom window so the timing math is done for you.
Troubleshooting Common Bulb Layering Failures
Most layering failures trace back to three causes: bulbs planted upside down, soil that stays wet, or layering order reversed so big bulbs smother small ones. Check bulb orientation first, because a bulb planted with the pointy end down will exhaust itself trying to grow the wrong direction.
Wet soil is the quiet killer. If your bed holds water, bulbs rot before they root, and you'll see gaps in spring with no obvious cause. Fix drainage before you plant, not after.
Reversed layering is the third trap. If small bulbs end up beneath large ones, they simply can't push through. Always place the biggest and deepest first and work upward.
Caring for Succession Blooms After Planting
Let the foliage of each layer die back naturally for at least six weeks after blooming. That green tissue feeds the bulb for next year, and cutting it early costs you the following season's flowers. Hide the fading leaves behind later-blooming perennials in a mixed border.
Water during dry fall and early spring spells, but never let the bed sit soggy. Once foliage yellows and goes dormant, you can tidy it away. Most perennial bulbs naturalize on their own and return stronger each year without lifting.
A light top-dressing of compost in early spring gives the root zone a nutrient boost before growth surges. Skip high-nitrogen fertilizer, which pushes leaves at the expense of blooms.
Getting succession blooms right comes down to one good planting day: the right bulbs, the right depths, and the right order. Firefly Farm and Mercantile stocks cold-hardy, deer-resistant varieties like Tete-a-Tete and Blushing Lady daffodils alongside double tulips such as Foxtrot and Palmyra, all chosen to layer into a season-long show. Our team, led by owner Andre, is known for the personal notes and planting guidance that come with every order. Get started with Firefly Farm and Mercantile and plant a spring that blooms for months, not weeks.

Frequently Asked Questions
How do you plant bulbs for succession blooms?
Plant bulbs in layers at different depths within the same hole, a method called lasagna planting. Place large bulbs like tulips 6 to 8 inches deep, mid-size bulbs like daffodils 4 to 6 inches deep, and small bulbs like muscari 2 to 3 inches deep. This staggered layering produces waves of color from early through late spring.
What is the best bulb layering order for continuous color?
Plant large, late-blooming bulbs deepest, mid-season bulbs in the middle layer, and small, early-blooming bulbs closest to the surface. For example, layer Foxtrot tulips at the bottom, Blushing Lady daffodils in the middle, and miniature Tete-a-Tete daffodils near the top. Each layer emerges at a different time, extending your bloom season.
How deep should I plant different types of spring bulbs?
As a general rule, plant bulbs at a depth equal to two to three times their height. Tulips go 6 to 8 inches deep, daffodils 4 to 6 inches deep, and small bulbs like muscari or crocus 2 to 3 inches deep. Always position bulbs with the pointy end up. Proper spring flowering bulbs planting depth protects bulbs from frost and supports strong root development.
Can I plant different bulb varieties in the same hole?
Yes, planting different varieties in the same hole is the foundation of the lasagna planting method. Choose varieties with compatible bloom times and hardiness zones. This approach saves space, reduces weeding, and creates a dense, layered display. Just ensure each bulb sits at its correct depth and that the soil between layers allows for good drainage.


