Planting Bearded Irises: A Step-by-Step Guide
Table of Contents
- Why Bearded Irises Belong in Your Garden
- Bearded Iris Soil Requirements and Site Selection
- When to Plant Bearded Irises
- How to Plant Bearded Iris Rhizomes
- Best Fertilizer for Bearded Irises
- Watering, Mulch, and Ongoing Care
- When to Divide Bearded Irises
- Container Gardening with Bearded Irises
- Troubleshooting Non-Blooming and Rotting Rhizomes
- Frequently Asked Questions
Why Bearded Irises Belong in Your Garden
Bearded irises are among the easiest perennials to grow, delivering dramatic color and fragrance in spring gardens. These hardy plants thrive across nearly every climate zone, from Zone 3 to Zone 10, adapting to whatever conditions your garden offers (planthardiness.ars.usda.gov). Once established, these perennials return reliably, multiply over time, and ask very little in return.
Bearded Iris Soil Requirements and Site Selection
Getting soil right is where most iris failures begin. These plants evolved in Mediterranean climates where soil dries quickly between rains. Plant them in heavy clay or constantly wet soil, and the rhizome, the thick underground stem storing energy for blooming, will rot within a season. This is the single most common reason gardeners report that their irises never flower.
Sunlight and Air Circulation
Bearded irises demand full sun to perform their best, requiring at least six hours of direct sunlight daily, though eight or more is ideal. In shadier conditions, plants rarely bloom reliably. More importantly, shade traps moisture around foliage and rhizome, creating the perfect environment for fungal problems and rot.
Air circulation matters as much as the sun itself. Plant bearded irises where air moves freely, not in dense shade or low-lying pockets where air stagnates. A breezy location keeps foliage dry after rain, preventing bacterial soft rot and iris leaf spot. Give your irises space; crowded conditions invite disease.
:::pro The most overlooked aspect of iris placement is air movement. A sunny spot sheltered from wind is actually worse than a spot with good air circulation, even if it receives slightly less direct sun. Prioritize airflow over perfect sun exposure. :::
Drainage and Soil Amendment
Bearded irises prefer well-draining soil with a pH between 6.0 and 7.5. If your garden has heavy clay, plant your irises on a slight mound or raised area where water drains away from the rhizome rather than trying to amend the entire bed.
Work organic matter into the top 6-8 inches of soil. Compost, aged bark, or well-rotted manure improves drainage in clay soils and adds structure to sandy ones. Mix in a balanced fertilizer or bone meal at planting time. If your soil tends toward acidity, add lime several weeks before planting to raise the pH.
The key principle: the rhizome itself should sit in soil that's moist but never waterlogged. The roots below need moisture access, but the rhizome needs air. This is why shallow planting matters so much.
When to Plant Bearded Irises
Most gardeners plant bearded irises in late summer through fall, roughly from mid-August through October (extension.umn.edu). This timing gives the rhizome time to establish roots before winter dormancy, so it emerges strong in spring ready to bloom. In cold climates where the ground freezes solid by November, plant earlier in this window. In milder regions, you can extend planting into early November. Spring planting is possible but less ideal; rhizomes planted in spring often struggle to establish before summer heat arrives.
Container-grown iris plants can be planted anytime during the growing season, though late summer and fall remain the best windows for establishment.
How to Plant Bearded Iris Rhizomes
Planting bearded irises correctly is straightforward once you understand the critical rule: the rhizome sits at or just barely below the soil surface. This shallow planting is the single most important factor in preventing rot and ensuring reliable blooming.
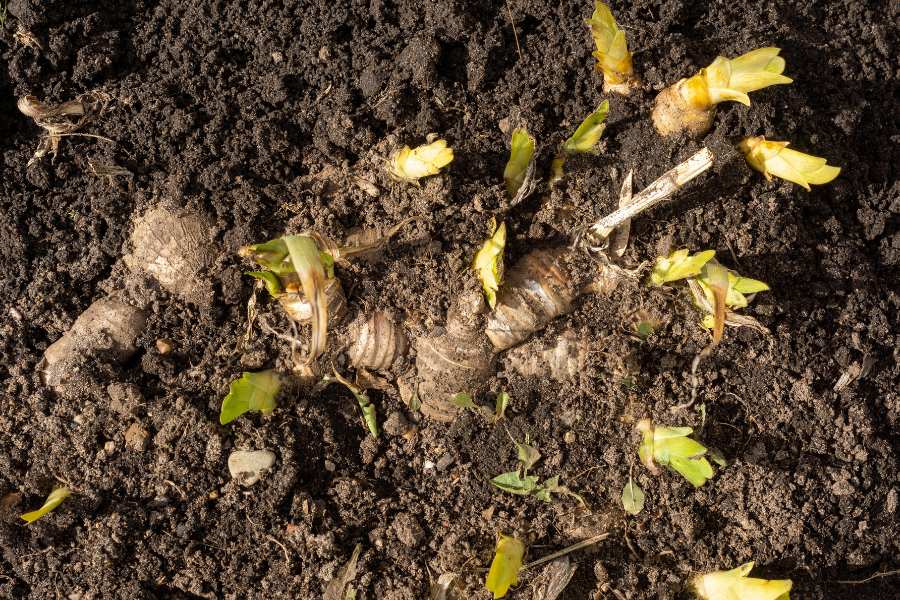
Gardener's hands carefully positioning a bearded iris rhizome in a prepared planting hole, showing the shallow mounding technique with the rhizome crown visible at soil level and soil gently pressed around the roots
Prepare a planting hole wide enough to spread the roots comfortably. Create a small mound of soil in the center and fan the roots out over it, allowing them to spread naturally downward and outward. Position the rhizome so the "fan" of leaves points in the direction you want the plant to grow. Backfill with amended soil, pressing gently to eliminate air pockets. Water thoroughly after planting to settle the soil, then reduce watering. The rhizome needs to establish roots without sitting in soggy conditions.
Planting Depth and Spacing
The top of the rhizome should be visible above the soil line or just barely covered. In clay soils, leave it completely exposed or cover it with only a dusting of soil. In sandy soils, you can bury it slightly deeper since water drains faster. You should be able to see or easily feel the rhizome crown when you look at your newly planted iris.
For an established look within two to three years, space rhizomes 12-18 inches apart. For a more immediate display, plant closer at 8-12 inches. Remember that bearded irises multiply through rhizome division, so a single planting eventually becomes a clump.
Identifying Healthy Rhizomes
Before planting, inspect your rhizomes. A healthy bearded iris rhizome is firm, with a pale or tan color and visible growth buds along the top. Healthy roots are white or tan and flexible, not black or slimy. Reject any rhizome that feels soft, smells sour, or shows dark spots and decay. styling outdoor pottery.
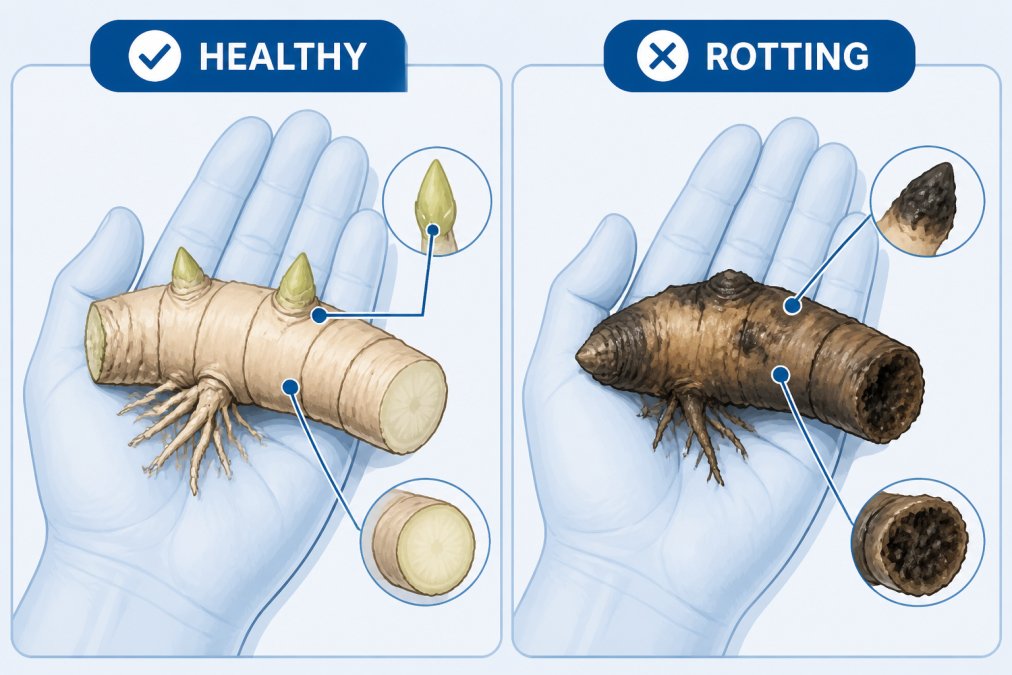
Side-by-side close-up of a firm, pale-tan healthy iris rhizome with visible growth buds in one palm, and a soft, discolored rotting rhizome showing dark spots and mushy texture in another palm, demonstrating the clear visual difference
Soft spots affecting less than a quarter of the rhizome can sometimes be cut away with a clean knife, but when in doubt, discard it.
Best Fertilizer for Bearded Irises
Bearded irises are not heavy feeders, but they benefit from targeted nutrition at the right time. A balanced fertilizer applied in early spring as new growth emerges supports strong foliage and blooming. Look for a formula with equal or nearly equal nitrogen, phosphorus, and potassium, such as 10-10-10 or 5-10-5.
Shop Firefly's Bearded Irises Now →
Avoid high-nitrogen fertilizers, which encourage leafy growth at the expense of flowers. Many gardeners apply bone meal or a low-nitrogen bulb fertilizer at planting time, then follow up with a balanced formula in spring. If your soil is naturally rich or well-amended, you may not need additional fertilizer at all.
Watering, Mulch, and Ongoing Care
Once established, bearded irises are remarkably drought-tolerant. They need regular water during the growing season, roughly one inch per week from rain or irrigation, but they don't want to sit in wet soil. Water deeply but less frequently rather than shallow daily watering.
After planting, water thoroughly to settle the soil, then ease back. Overwatering newly planted rhizomes is a common mistake. Mulch lightly around your irises, keeping mulch away from the rhizome itself. A thin layer of compost or aged bark helps retain moisture and suppress weeds, but piling mulch over the rhizome traps moisture and invites rot.
As plants mature and begin to bloom, reduce watering slightly. Once bearded irises are established, they rarely need supplemental water except during severe drought.
When to Divide Bearded Irises
Bearded irises multiply through rhizome division, and every three to four years, an established clump becomes crowded. Divide when the center of your clump stops flowering or plants look congested.
The best time to divide is late summer through early fall, the same window you'd use for planting new rhizomes. Dig up the entire clump carefully, then gently separate individual rhizomes by hand or with a clean knife. Each division should have at least one growth bud and a healthy fan of leaves. Discard old, woody rhizomes from the center and replant younger, vigorous divisions.
Container Gardening with Bearded Irises
You can grow bearded irises in containers, and for gardeners with heavy clay soil or limited space, containers offer a solution. Use a pot at least 12 inches deep with drainage holes, filled with well-draining potting mix amended with extra perlite or coarse sand.
Plant the rhizome at the same shallow depth as in the ground, the crown at or just above the soil surface. Container-grown irises need more frequent watering than in-ground plants since pots dry faster. Water when the top inch of soil feels dry. Repot every two to three years, refreshing the potting mix and dividing rhizomes if they've multiplied.
Aspect | In-Ground | Container |
|---|---|---|
Drainage Control | Requires amendment | Complete control |
Watering Frequency | Moderate (1x weekly) | Frequent (every 2-3 days) |
Root Establishment | Faster | Slower initially |
Long-term Vigor | Excellent | Good (needs repotting) |
Best For | Most gardeners | Limited space or poor soil |
Troubleshooting Non-Blooming and Rotting Rhizomes
Non-blooming irises most often suffer from insufficient sunlight, overcrowding, or nitrogen-heavy fertilizer. Move the plant to a sunnier location, divide overcrowded clumps, or switch to a lower-nitrogen fertilizer. Rhizomes planted too deep also rarely bloom; if you suspect this, dig carefully and expose the rhizome crown.
Rotting rhizomes indicate either poor drainage or overwatering. If the entire clump is affected, the soil itself may be the problem. Dig up remaining healthy rhizomes, amend the planting area with sand or perlite to improve drainage, and replant them shallower. If only one or two rhizomes in a clump are soft, remove and discard them to prevent the spread of bacterial soft rot.
Planting bearded irises successfully comes down to understanding their simple needs: full sun, excellent drainage, and shallow planting. Once you've mastered these basics, you'll enjoy reliable blooms and easy care for years. Firefly Farm and Mercantile offers a carefully curated selection of bearded iris cultivars, including award-winning varieties like Bearded Iris 'Edith Wolford' and the stunning Bearded Iris 'Sharp Dressed Man', each selected for hardiness and garden performance. Start with healthy rhizomes from a trusted source, plant them correctly this fall, and you'll have a thriving iris display that rewards you with beauty season after season.


Frequently Asked Questions
When is the best time to plant bearded irises?
Plant bearded irises in late summer through early fall, ideally August through September. This timing allows the rhizome to establish roots before winter dormancy. Spring planting is possible but less ideal because irises need time to settle before blooming season. Avoid planting during the hot, dry months of summer or during the iris blooming season in spring.
How deep should bearded iris rhizomes be planted?
Plant bearded iris rhizomes shallow, with the top of the rhizome exposed or just barely covered with soil. The rhizome should sit on a mound of soil with roots spreading down into it. Planting too deep is the most common cause of rot and non-blooming. In hot climates, a thin layer of soil is acceptable, but the rhizome should never be buried completely.
What type of soil is best for planting bearded irises?
Bearded irises thrive in well-draining soil with a pH between 6.0 and 7.0. They prefer soil that is not overly rich. Mix in organic matter like compost or aged manure to improve drainage if your soil tends to hold moisture. Heavy clay soils should be amended with sand, perlite, or grit to prevent water from pooling around the rhizome, which causes rot.
How long can iris rhizomes stay out of the ground before planting?
Iris rhizomes can typically stay out of the ground for 1-2 weeks if stored in a cool, dry location. Beyond that, they risk drying out or developing rot. If you must wait longer before planting, store rhizomes in a paper bag in a cool basement or garage. Avoid plastic bags, which trap moisture and encourage fungal growth. Plant as soon as possible for the best results.


